Back to search results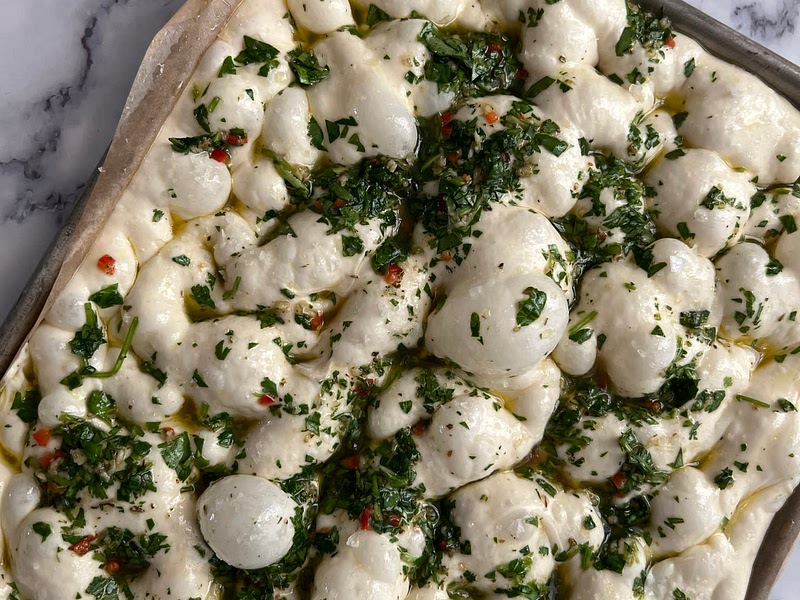
Overnight Focaccia
5.0 (2506 reviews)
This squishy focaccia is such a crowd pleaser! It's the perfect bread to impress your guests at any gathering: it's great served alongside a cheeseboard, a salad or of course when used to make sandwiches. You need this recipe in your repertoire! The secret to this focaccia recipe is time - you donât spend much time actually mixing/handling the dough, but the dough does spend a considerable amount of time (24-48 hours) slowing rising in the fridge. This adds to the flavour and the structure (bubbles) of the focaccia and I promise itâs worth the planning ahead!
Total Time40
Servings12
2662.99
Caloriesper servingNutrition Information
2662.99
Calories
87.21 g
Fat
390.57 g
Carbs
75.56 g
Protein
18.02 g
Fiber
15.16 g
Sugar
Ingredients
- 500g white bread flour (12% protein content or higher, see notes on flour below
- 420ml slightly warm water, just a bit warmer than your body temperature
- 4g 1 teaspoon) instant yeast If using âdry activeâ yeast, you must add 1g (1/4 tsp) extra and mix it with the warm water and honey and let it bloom/become frothy for 5-10 minutes before adding other ingredients
- 5g honey (1 teaspoon) (sub maple syrup or granulated sugar to make vegan)
- 15ml (1 Tablespoon) extra virgin olive oil
- 10g (2 teaspoons) fine sea salt
- Extra virgin olive oil, for drizzling
- Flaky sea salt, to finish
- Olives
- Rosemary
- peppers
- cherry tomatoes
- herbs
- cheese
- jalapenos
- onions
- pesto
- chimichurri
Instructions
- 1Please see the notes below the recipe about the importance of using bread flour for this recipe and how to adapt the recipe for plain/all purpose flour if bread flour isnât available.
- 2Day One - Dough Mixing Day
- 3In a large mixing bowl, stir together the slightly warm water, instant yeast, honey, extra virgin olive oil and fine sea salt until evenly combined. Tip your bread flour into the bowl with the rest of the ingredients and mix with a spoon until all dry flour patches have disappeared. Place cloth over top of bowl, let rest for 10 minutes at room temperature.
- 4After 10 minutes, you will perform a stretch + fold. This helps to develop the gluten in the dough which will help with the structure of the bread. Wet your hand (this prevents dough from sticking to you), grab a handful of dough from the 12 oâclock position, pull it up slightly and then pull it all the way up and over the bulk of the dough to the 6 oâclock position. Repeat this action on all sides of the dough until it feels like youâve created a bit tension and you canât stretch the dough up and over anymoreâ¦it should have tightened up into a rough ball. If the dough is wetter/stickier than mine is (in video tutorial Iâve linked) and doesnât form into a ball, donât worry too much! Itâs just that all bread flours absorb different amounts of water. It should bake up just fine the following day! Let rest for 10 minutes and then repeat the stretch + fold action one more time.
- 5After the second set of stretch and folds, wet your hands, gather your dough and place it seam side down into bowl so the top is quite smooth (this helps prevent air bubbles from escaping).
- 6Top the dough with a good drizzle of olive oil (1 Tbsp) and rub it over the dough to make sure entire top surface has been covered. Cover your bowl with a reusable shower cap, a lid, plastic wrap, or transfer into a Tupperware container. The dough will rise in the fridge during its rest, so make sure there is room in the bowl for growth. Put in coldest spot of your fridge and let rest in there for 12 - 48 hours.
- 7Day Two - Baking Day
- 8Prepare your 9â x 13â (22cm x 33cm) baking tray. Put a tiny bit of oil on the tray, rub it all around and then place a sheet of parchment paper on top and press down. The oil helps the parchment to stick in place. Then drizzle about 2-3 tablespoons of olive oil on the parchment paper and spread it evenly around the base and sides of the paper lining the tray/pan. The parchment prevents the focaccia from sticking to the tray when baking.
- 9Remove your dough from fridge and using a curved dough scraper, gently release the dough from the sides of the bowl and tip the dough into your oiled and lined tray.
- 10Now, you are going to oil your hands and fold one side of dough towards the middle of the blob of dough. Repeat with the other side, a bit like folding a piece of paper into thirds. Then flip the dough so the seams from the folding are at the bottom and the smooth side is at the top.
- 11Cover using another tray, inverted - this prevents the dough from drying out and forming a crust while it rises. If you donât have another tray, a plastic storage box can work too. Do not cover the dough with plastic wrap or a tea towel, it will stick.
- 12Let sit for about 1.5 - 2.5 hours (the dough should be mostly filling the space in the tray). If itâs not filling the space after this period of time, oil your hands and from the underside of the dough you gently pull it towards the edges of the tray. The timing will depend on the temperature on the day. If itâs a very hot day it might only take 1.5 hours to puff up/spread in tray. On a very cold day it could take 2.5 hours.
- 13Dimpling, Topping + Baking Your Focaccia
- 14Once you think the dough is ready (it will be floofy and jiggly when you shake the tray), itâs time to preheat your oven to 220C/430F.
- 15Drizzle the top of the dough with a little more extra virgin olive oil and then oil your hands. Using both hands, press your fingers into the dough, gently touching the bottom of the tray. Repeat until the entire tray of dough is dimpled. There is such a thing as too much dimpling thoughâ¦you can lose some of the nice bubbles youâve created in the dough if you dimple too much. Just be mindful of air pockets and try not to pop themâ¦these bubbles are what make the crumb of a focaccia so interesting and delicious.
- 16Top with a sprinkle of flaky sea salt. Add anything youâd like to the top by gently pressing toppings into the little dimples: olives, rosemary (coat in a bit of oil so it doesnât burn), cherry tomatoes, onions, jalapeños + cheese. Before dimpling, you could top with basil pesto or with my chimichurri sauce if using oily toppings like these, then omit the drizzle of olive oil.
- 17I always bake my focaccia for about 18-22 minutes in a 220C/430F oven. I bake it on the lowest rack in the oven because I think it helps to crisp the bottom of focaccia and prevent the top from burning. If you have a pizza setting in your oven, use that; the main heat source will come from the bottom, which I think is ideal for baking focaccia. Check the focaccia after 18-20 minutes (it might still need more time!) and remove from oven when itâs reached a deep golden brown colour. I've learned that every oven is so different so don't worry about overbaking it if it takes closer to 25-28 (or more) minutes in your oven. The interior will still remain soft! If this is the case and it takes on the longer side, even up to 35 mins, Iâd recommend upping your oven temp for the next time (turn up by 10-20 degrees), it could just be your oven runs a little on the cooler side.
- 18I let it cool for a couple of minutes in the pan and then I transfer it to a cooling rack so the bottom doesnât steam while sitting in the tray. I want it to stay nice and crispy.
- 19You can top with more olive oil when itâs come out of the oven if you wish for it to look burnished and glistening. If Iâve topped the focaccia with pesto or chimichurri I donât tend to do this. With other toppings I do a little drizzle and it soaks right into the crust when itâs hot out of the oven.
- 20Let cool for at least 15-20 minutes before cutting in!
- 21NOTES ON FREEZING FOCACCIA
- 22Itâs best enjoyed fresh the same day, but if youâd like to save some for the next day, wrap it in foil to store and then pop into oven (still in foil) and bake at 180C/355F for about 10-15 minutes. It will bring it back to life. It can also be wrapped in foil and frozen. Bake in foil straight from frozen at 200C/395F for about 15 minutes. Peel back the foil to expose the top of the focaccia and bake for an additional 2-3 minutes to crisp up the top.
- 23I hope this guide has been helpful. I tried to include as many details as possible for novice bakers. Feedback from people who have tried this recipe has been that the video tutorial was enormously helpful, so have a look at that if you can.
- 24NOTES ON FLOUR
- 25TYPE OF FLOUR You will get the best results using white bread flour with 12% protein content or higher. So for every 100g of flour, there are 12 or more grams of protein listed in the nutritional count. To calculate this, take note of the serving size on your pack of flour - it's normally 30g. Then check the grams of protein per serving and multiply this by whatever number you need to for the serving size to be 100g. So if there are 4g protein per/30g flour, then multiply 4g x 3.33 to see how much protein there is in 100g. In this case it would be 13.32g of protein per 100g.
- 26WHY DO I NEED HIGH PROTEIN FLOUR? My favourite flour for focaccia is Canadian/Manitoba bread flour which is 15% protein, but normal bread flour is also fine! The focaccia can hold itâs air bubbles inside more efficiently when you use flour with a higher protein content. This is because more protein generally means stronger gluten, and gluten is what gives your bread structure.
- 27I realise that bread flour is not readily available in some countries. I hope that focusing on the protein content helps you narrow down your choices. If you can only find plain/all purpose flour with a protein content of 9-10%, Iâd recommend reducing the water in the dough by 30g -40g. Using flour with a lower protein content will mean your focaccia will probably not have many big air bubbles. I would not recommend using whole grain/whole wheat flours in focaccia. The fibre content of these flours mean your focaccia will be dense, not fluffy!
- 28NOTES ON EQUIPMENT
- 29WHAT EQUIPMENT DO I NEED? - digital kitchen scale - large mixing bowl - 9âx13â (23cm x 33cm) baking pan or tray - curved dough scraper (you can do without this but it helps you to easily remove the focaccia dough from the bowl when itâs time to transfer it to pan) -nonstick parchment/baking paper
- 30CAN I MEASURE WITH CUPS? If you intend to bake bread, you will need to invest in a digital kitchen scale in order to ensure precise measurements. Measuring flour/water in cups leaves too much room for user error. Digital scales ensure that you're following the recipe properly.
- 31NOTES ON YEAST
- 32I find that instant yeast is easiest because you donât need to let the yeast bloom/activate before mixing the dough. If you are using dry active yeast, use 1/4 teaspoon/1g extra and mix with warm water and honey. Let sit for 5-10 minutes to bloom before adding in the other ingredients. If you are using fresh yeast, use 12g. Dissolve with the the warm water and honey and let bloom for 5-10 minutes before adding in other ingredients.
- 33Make sure your yeast is in date, and if it's a big container of yeast, be sure it was opened recently (within last 3/4 months). Yeast loses its oomph over time.